RPG Map Editor
This is the user manual for RPG Map Editor 1.6.1, an autotile map editor for Unity by Creative Spore. You paint top-down 2D maps in the style of RPG Maker, straight in the Scene view, with the same tileset sheets RPG Maker uses. The manual covers the inspectors and windows, the painting controls, the sample gameplay framework and the scripting API.
What it does
A map is built from three pieces. Each one has its own page further on.
AutoTileset is an asset that holds your tile art. It indexes one atlas texture, split into slots. A slot takes either the five RPG Maker autotile sheets (A1 to A5) or four sheets of plain tiles (B to E). Water, grass, walls and the other autotiles join up with their neighbours as you paint. See Tilesets.
AutoTileMapData is an asset that stores the map: its size in tiles, its layers and every tile painted on them. In the inspector it is the Map Data field. Two scenes that point at the same Map Data asset show the same map. See Maps.
AutoTileMap is the component you add to a scene object. It takes a tileset and a map data asset, builds the map meshes, and answers collision questions for characters. Its inspector is where you paint.
Around those three, the package gives you:
- Per-tile collision types (block, wall, fence, overlay) that characters and pathfinding respect. See Tile Collisions.
- Any number of layers per map, each with its own sorting layer and depth. See Layers.
- A fog of war layer that characters uncover as they move. See Fog of War.
- An in-game map editor that runs in play mode and in builds. See In-Game Map Editor.
- A* pathfinding over the map tiles. See Pathfinding.
- An optional gameplay layer with characters, vehicles, NPC behaviours, teleporters and a camera. See Gameplay Framework.
Requirements
- Unity 2022.3 or later, up to Unity 6. The asset is tested on 2022.3.62f2 and Unity 6.
- The 2D Sprite package (
com.unity.2d.sprite) for slicing character sheets in the Directional Animation Controller inspector. Everything else in the editor works without it. When it is missing, that inspector shows a warning with anInstall 2D Sprite packagebutton. - Any
Active Input Handlingsetting: Input Manager (Old), Input System Package (New) or Both. See Input.
The asset uses Unity's built-in 2D rendering and the Sprites/Default shader. It does not depend on URP, and it runs in a URP project as well.
What gets installed
Everything lives under Assets/CreativeSpore/RpgMapEditor/:
| Folder | What is in it |
|---|---|
Scripts |
The tool. AutoTileMap holds the map, tileset and in-game editor code, Editor the inspectors and windows, MapPathFinding the A* pathfinder, RpgFramework the sample gameplay layer, Utils the RpgInput wrapper. |
Samples |
The five demo scenes and their map data, the demo AutoTileset, the character and tileset art, 16 prefabs and two demo scripts. |
Documentation |
This manual as a PDF, and RPG Map Framework.pdf. |
changelog.txt sits at the root of the folder. The same list is on the Changelog page.
The demo scenes are described in Sample Scenes. The Start Painting and Use Demo Tileset buttons both reuse the demo tileset in Samples/Scenes, so they are greyed out if you delete the Samples folder.
The welcome window
The welcome window opens by itself after you import the asset, and once in each editor session after that, until you clear Show this window on startup at the bottom. Open it again any time from Tools > RpgMapEditor > Welcome. The installed version is shown in its bottom right corner.
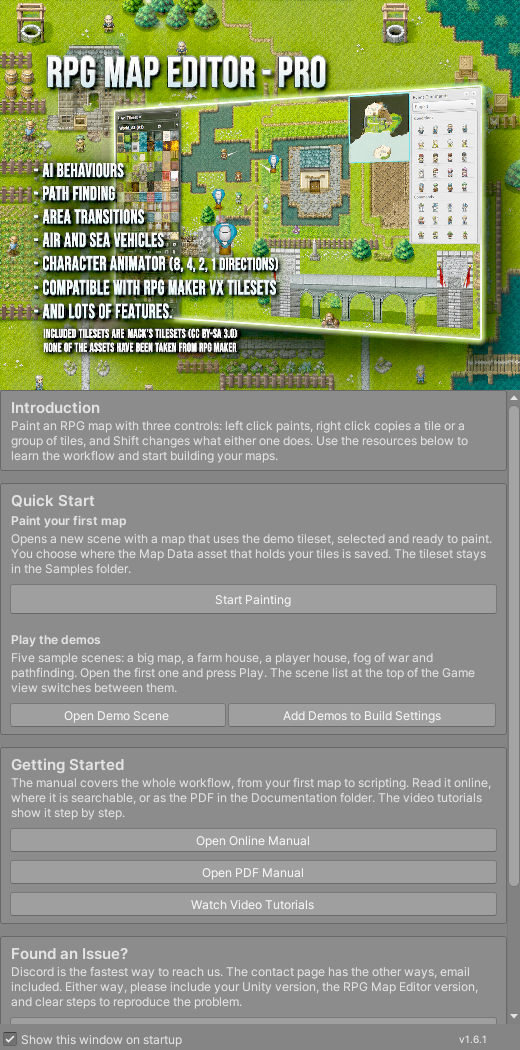
The Quick Start card has three buttons:
Start Paintinggives you a map to paint on in one click. It asks where to save a new Map Data asset, then opens a new scene with a map that uses the demo tileset, already selected and on itsPainttab. Getting Started walks through it.Open Demo Sceneopensdemo1 - Big Map. You are asked to save the open scene first if it has changes.Add Demos to Build Settingsadds the five demo scenes to the end of the Build Settings scene list and skips any already there. You only need it for a player build, or in 1.6.1 for the doors that move between demo scenes. It is greyed out once all five are listed.
Below that, Getting Started opens this manual online, its PDF copy in the Documentation folder, or the video tutorials. Found an Issue? opens the Discord server or the contact page, and Thank You links to the Asset Store page.
Where to go next
- Getting Started takes you to a painted map, with the Quick Start button or by hand.
- Sample Scenes lists what each demo shows.
- Tilesets explains building an atlas from RPG Maker sheets.
- Painting covers the paint tools, layers and the brush.
- Keyboard and Mouse is the full list of controls.
- Scripting shows how to read and change tiles from code.
- Troubleshooting and the FAQ answer the common problems.
- Help & Support has Discord, email and what to put in a bug report.
Questions get answered fastest on Discord, where other users can help too.