Getting Started
This page takes you from an atlas texture to a painted tilemap with colliders, in the fewest steps. Each step links to the page that covers it in full.
Concept
Everything starts with a tileset, an asset made from one atlas texture. You slice the atlas into tiles once, and from then on any number of tilemaps can paint with it. A tilemap is a component on a scene object. You pick its tileset, open the Paint tab in its inspector and paint in the scene view.
Create a tileset
- Import your atlas texture into the project. Any texture laid out as a grid of equally sized tiles works.
- Select the texture in the Project window, then choose
Assets > Create > SuperTilemapEditor > Tileset. The new tileset is created in the same folder, named after the texture, with the texture already in itsAtlas Texturefield. If no texture is selected, you get an empty tileset and setAtlas Textureyourself. - In the tileset inspector, click
Optimize Atlas Texture Settings. This sets the texture to import as a sprite with no mipmaps,Pointfiltering, no compression and a max size big enough for the whole texture. - Open the
Atlas Settingsfoldout and fill inTile Size (pixels). SetOffsetif the tiles do not start at the top left corner of the texture, andPaddingif there are gaps between tiles. - Click
Slice Atlas. The tiles appear in the tile palette under theTilestab.
If a slice comes out wrong, fix the values and click Slice Atlas again. When the tileset already has tiles, you are asked whether to keep their previous properties. Answer Yes to copy colliders, parameters and prefabs across to the new tiles in order.
Pixels Per Unit decides, together with the tile size, how big one cell is in world units. It starts at 100. When you drag a texture into the Atlas Texture field, it is copied from that texture's import settings. A tileset created from a selected texture keeps 100, so check it matches your sprites.
Tip
If the texture is already sliced into sprites in Unity's Sprite Editor (Sprite Mode set to Multiple), drag it into the Atlas Texture field of an empty tileset. The tileset reads the tile size, offset and padding from those sprites and creates the tiles for you, so you can skip the slicing step.
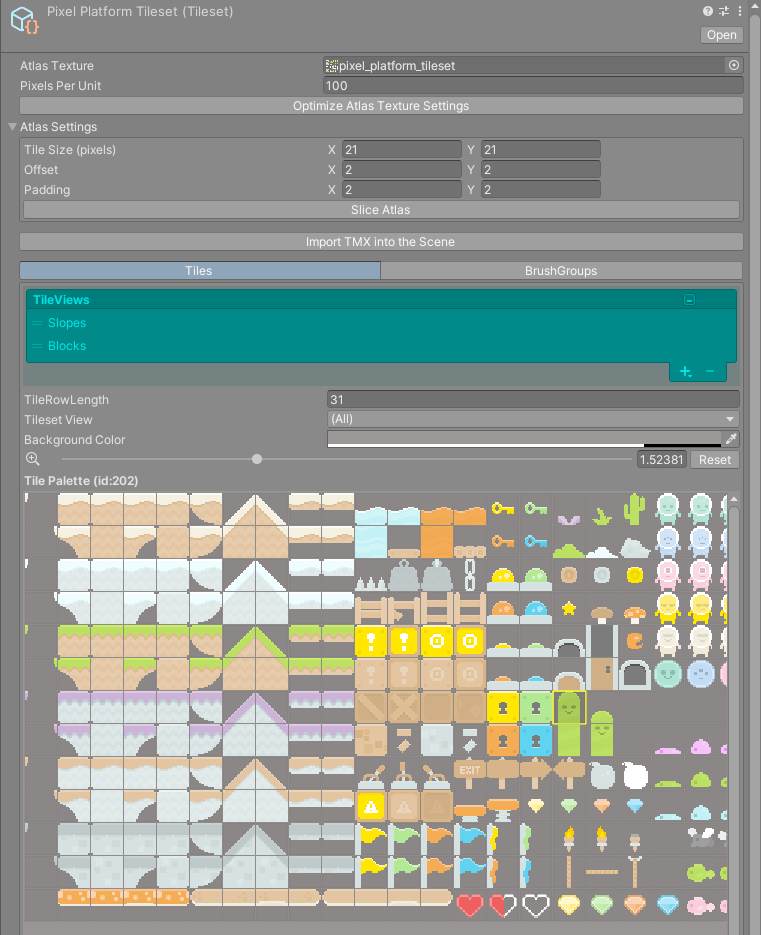
More on slicing and the palette in Tilesets and Tile Palette.
Create a tilemap
- Choose
GameObject > SuperTilemapEditor > Tilemap. The same entry is in the Hierarchy window's right-click menu, where it creates the tilemap as a child of the object you clicked. - In the inspector, drag your tileset into the
Tilesetfield at the top.
The first time you assign a tileset, the tilemap sets its cell size from it: tile size in pixels divided by Pixels Per Unit. You can change it later in the Map tab. See Map.
For levels with several layers, create a GameObject > SuperTilemapEditor > TilemapGroup and add tilemaps to it. See Tilemap Groups.
Paint
- With the tilemap selected, open the
Painttab in its inspector. It shows the tile palette. - Click a tile in the palette. Drag across the palette to select a block of tiles and paint them as a pattern.
- Move the mouse over the scene view. A preview of the selected tiles follows the cursor, snapped to the grid.
- Click or drag with the left mouse button to paint.
While painting is available, the Tilemap Tools overlay shows in the scene view with the paint, erase and fill buttons, the flip and rotate buttons and the shape tools (line, rectangle and ellipse).
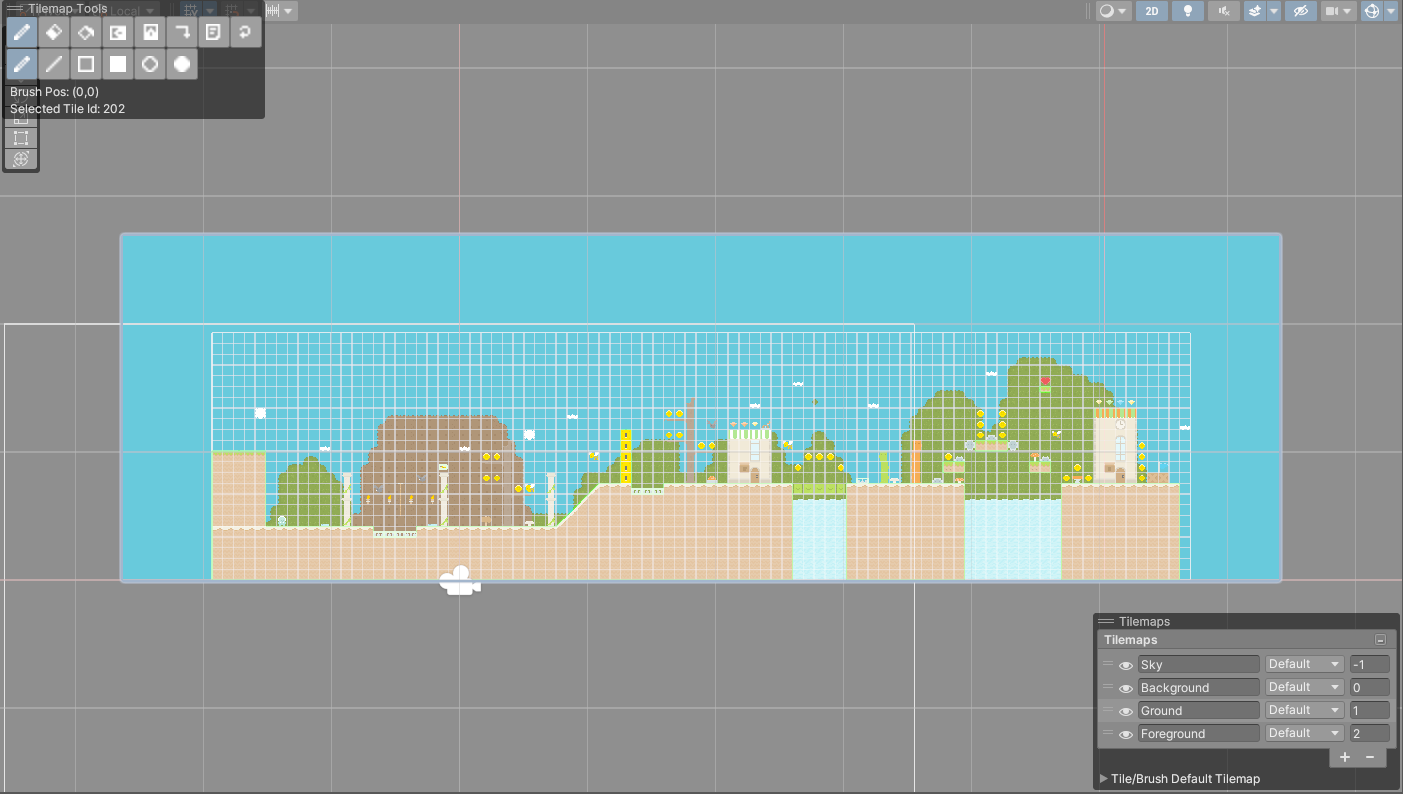
Note
Painting only works while Unity's Rect tool (T) or no transform tool is active. If the Move, Rotate or Scale tool is selected, the overlay shows a warning and clicks go to the tool instead. Clicking the paint, erase or fill button on the overlay switches the transform tool off for you.
The full set of tools, and how brushes and shapes behave, is in Painting.
Erase
With the default paint tool, hold Shift and click or drag to erase. The eraser covers the same area as the current brush, so a 3 by 2 selection erases 3 by 2 cells.
You can also click the erase button on the overlay, or right-click an empty cell in the scene view. That picks up an empty tile, and painting with it erases.
Fill
Double-click a cell with a single tile selected to flood fill the connected area of matching cells. Or click the fill button on the overlay and then click once. With the fill button active, a highlight shows which cells the fill will cover before you click.
If you have a block of tiles selected, the fill button repeats it as a pattern across the area.
Add colliders
Colliders come from two places. Each tile in the tileset carries a collider shape, and each tilemap decides whether to build colliders from those shapes.
- Right-click a tile in the palette. This selects it and opens the Tile Properties window. You can also open it from
SuperTilemapEditor > Window > Tile Properties Window. - In the
Collidertab, setCollider Type:toFullfor a solid square orPolygonfor a custom shape. To set several tiles at once, drag across them in the palette first. The window then edits the whole selection. - Select the tilemap and open the
Collidertab in its inspector. - Under
Collider Type:, choose2Dor3D. 2D colliders are edge colliders by default. 3D colliders are a mesh collider per chunk.
When you change a tile collider in the Tile Properties window, the selected tilemap updates straight away. Other tilemaps using the tileset pick up the change the next time they refresh. Press F5 in the scene view while the Paint tab is open, or click Refresh Map in the Map tab.
With the tilemap's Collider tab open you can also edit tile colliders directly in the scene view, over the painted tiles. See Colliders and Tile Properties.