Tilemap Groups
A TilemapGroup manages several tilemaps as the layers of one level. This page covers creating a group, the tilemap list in the inspector and in the Scene view, switching between layers, and reaching the tilemaps from a script.
Concept
A group is a GameObject with a TilemapGroup component and tilemaps as its children. Every STETilemap below it in the hierarchy, active or not, is part of the group. The group keeps one of them selected, and while the group is selected in the Hierarchy, painting goes to that tilemap.
Typical layers are a sky or background, the ground the player collides with, and decoration in front. Each is a normal tilemap with its own tileset, sorting, parallax and colliders.
How to use it
- Choose
GameObject > SuperTilemapEditor > TilemapGroup. A GameObject calledTilemapGroupappears and is selected. - Click
+under theTilemapslist to add a tilemap. Repeat for each layer. - Click a row to make that tilemap the one you edit. Its full inspector appears below the list, with the same tabs as a single tilemap.
- Paint in the Scene view as usual.
To turn existing tilemaps into a group, add SuperTilemapEditor > TilemapGroup from Add Component to their parent object. The group picks them up straight away.
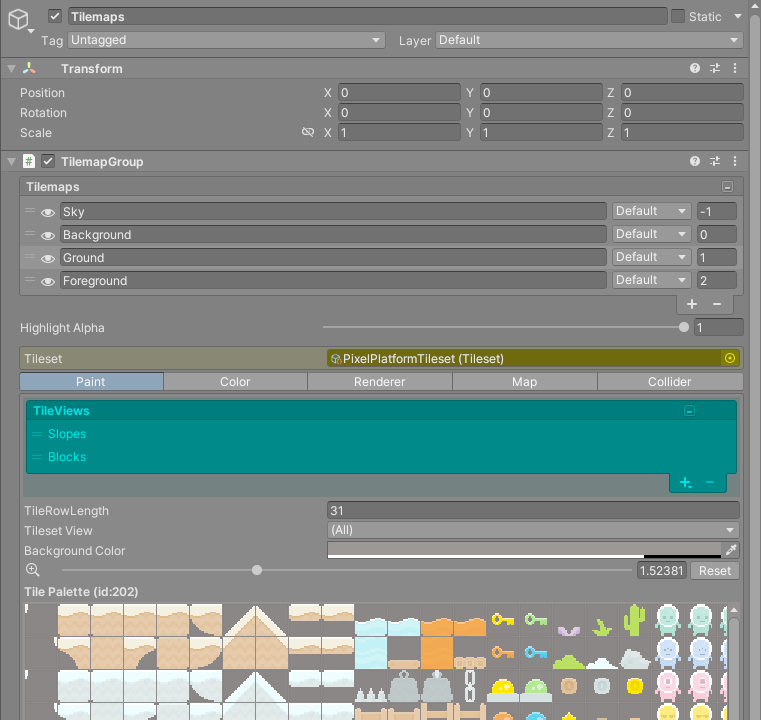
The tilemap list
Each row shows one tilemap:
- an eye toggle that shows or hides it, the same as
Visiblein its Renderer tab, - its name, which you can edit in place,
- its sorting layer and order in layer.
While the Collider tab is open, the sorting fields are replaced by the tilemap's collider type (None, 2D, 3D), so you can set up the colliders of every layer from one place.
| Control | What it does |
|---|---|
| Click a row | Makes that tilemap the selected one in the group. |
| Drag a row | Reorders the tilemaps. The order of the children in the Hierarchy changes to match. |
+ |
Adds a new tilemap as a child of the group. If a tilemap is selected, the new one copies its settings (tileset, material, sorting, colliders) and takes its name with a number added. It starts empty. |
- |
Deletes the selected tilemap's GameObject. You can undo it. |
| Button on the right of the header | Collapses the list to its header, or expands it again. |
Below the list, Highlight Alpha dims the tilemaps you are not editing. It multiplies their color by the value while the group, or a tilemap in it, is selected in the editor, so the layer you are working on stands out. The default, 1, dims nothing. It has no effect in Play mode or in a build.
The Tilemaps overlay
The same list appears in the Scene view as an overlay called Tilemaps, docked by default at the bottom of the right column. It shows up when you select the group or any tilemap inside it, so you can switch layers without going back to the inspector. You can resize it sideways to make room for the names.
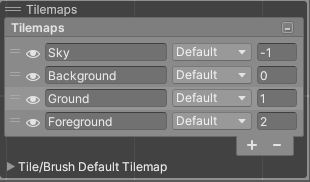
Switching between tilemaps
To change the tilemap you are editing:
- click its row in the list, in the inspector or in the overlay,
- press
+or-on the numeric keypad while the Scene view has focus, which cycles through the list and wraps around at the ends, - hold
Ctrland right click a cell in the Scene view, which selects the first visible tilemap from the top of the list that has a tile in that cell and picks that tile up as the brush, - select the tilemap in the Hierarchy. It also becomes the group's selected tilemap.
Only the keypad keys cycle. The + and - keys on the main keyboard do nothing here.
Selecting a tilemap in the Hierarchy shows that tilemap's own inspector and paints on it. Select the group object itself when you want the list in the inspector and painting to follow the list.
Default tilemap per tile or brush
The Tile/Brush Default Tilemap foldout, at the bottom of the Tilemaps overlay, links tiles and brushes to a layer. Once a tile has a default tilemap, picking that tile in the palette switches the group to that tilemap. Pick a grass brush and you land on the ground layer, pick a cloud and you land on the sky.
| Button | What it does |
|---|---|
Set Default Tilemap (For the Palette Selection) |
Links what is selected in the palette to the group's selected tilemap. |
Remove Default Tilemap (For the Palette Selection) |
Removes that link. |
Set Default Tilemap (For the Tiles in the Tilemap) |
Links every tile and brush used in the selected tilemap to it. |
Set Default Tilemap (For all Tilemaps) |
Does the same for every tilemap in the group, each to its own layer. |
Clear Default Tilemap Data (For all Tiles) |
Removes every link. |
The line above the buttons shows the default tilemap of the current palette selection, or <none>.
Other group features
- The
Refresh Tilemap (F5)button on theTilemap Toolsoverlay refreshes every tilemap in the group when the group is selected. See Painting. - The Color tab has a
Paint Tilemap Groupoption that paints all visible layers at once.
Scripting
TilemapGroup gives you two indexers, both read only:
using CreativeSpore.SuperTilemapEditor;
using UnityEngine;

public class LevelLayers : MonoBehaviour
{
    [SerializeField] private TilemapGroup m_group;

    void Start()
    {
        // By GameObject name. Returns the first tilemap with that name, or null.
        STETilemap ground = m_group["Ground"];

        // By position in the list, the same order as the inspector.
        STETilemap first = m_group[0];

        // The whole list, and the one selected in the editor.
        foreach (STETilemap tilemap in m_group.Tilemaps)
            Debug.Log(tilemap.name);
        STETilemap selected = m_group.SelectedTilemap;
    }
}
The index form throws if the index is out of range. FindTilemapByName("Ground") is the same lookup as the name indexer, and IterateTilemapWithAction runs a method on every tilemap in the group. If you add or remove tilemap children from a script, call Refresh() to rebuild the list. More in Scripting.